The Grav plugin to provide server-side syntax highlighting using the highlight.php library is essentially complete. We just need to update the documentation and do a quick run-through of the checklist under the Grav Theme/Plugin Release Process, reproduced below:
- It is open source with a
LICENSEfile that provides an MIT compatible license. - Contains a
README.mdfile with a summary of functionality and instructions on how to install and configure it. - Contains a
blueprints.yamlfile with all required fields. - Provide a
CHANGELOG.mdin the correct format. - Provides appropriate attribution if you use any other libraries, scripts, code.
- Create a release for your finished plugin/theme. The Grav repository system requires a release and will not find your plugin/theme unless there is a release that contains all of the above.
- Add an issue to the Grav issues tracker with details about your plugin, and we will give it a quick test to ensure it functions, and then add it. Note that you don’t have to do this if you’re releasing a new version of plugin or theme that’s already in the repository. It will be picked up automatically.
The LICENSE file
Already sorted in the first commit.
The README.md file
The scaffolded README tells us that it “should be modified to describe the
features, installation, configuration, and general usage of the plugin,” and has
some useful boilerplate to modify and adapt.
I’ve elected to create a couple of examples and render them out with the Quark
Grav theme and default syntax highlighting theme from the plugin. Keeping with
conventions, I’ve stored screenshots of the result in a new assets folder in
the root of the plugin directory.
Attributions/Credits
One of the best parts of open source! Added a section with a little series of hat-tips and links to the makers of the libraries that make this plugin possible. Easy peasy.
The blueprints.yaml file
Already sorted, as of the commit after the previous installment of this series
The CHANGELOG.md file
This one is pretty straightforward for an initial release. Just a version number, a date, and a little blurb about this being the first release, and we’re done. The official documentation on the ChangeLog Format is available here.
# v0.9.0
##  20-03-2022

1. [](#new)
    * First version of the plugin ready for consideration to be included in the Grav repository. (Works on my machine™️).
Creating a release
After saving, committing, and pushing the remaining changes, it’s just a matter of following GitHub’s instructions for managing releases in a repository, making sure that the tag matches what’s in the changelog.
I’ve elected to tag this first release as version 0.9.0; after the Grav team tests that it works and accepts it into the Grav Repository (possibly with any changes to squash a bug I’ve missed), I’ll create a new release at version 1.0.0.
That release is now available at https://github.com/iainsgillis/grav-plugin-highlight-php/releases/tag/v0.9.0
Add to the Grav issues tracker
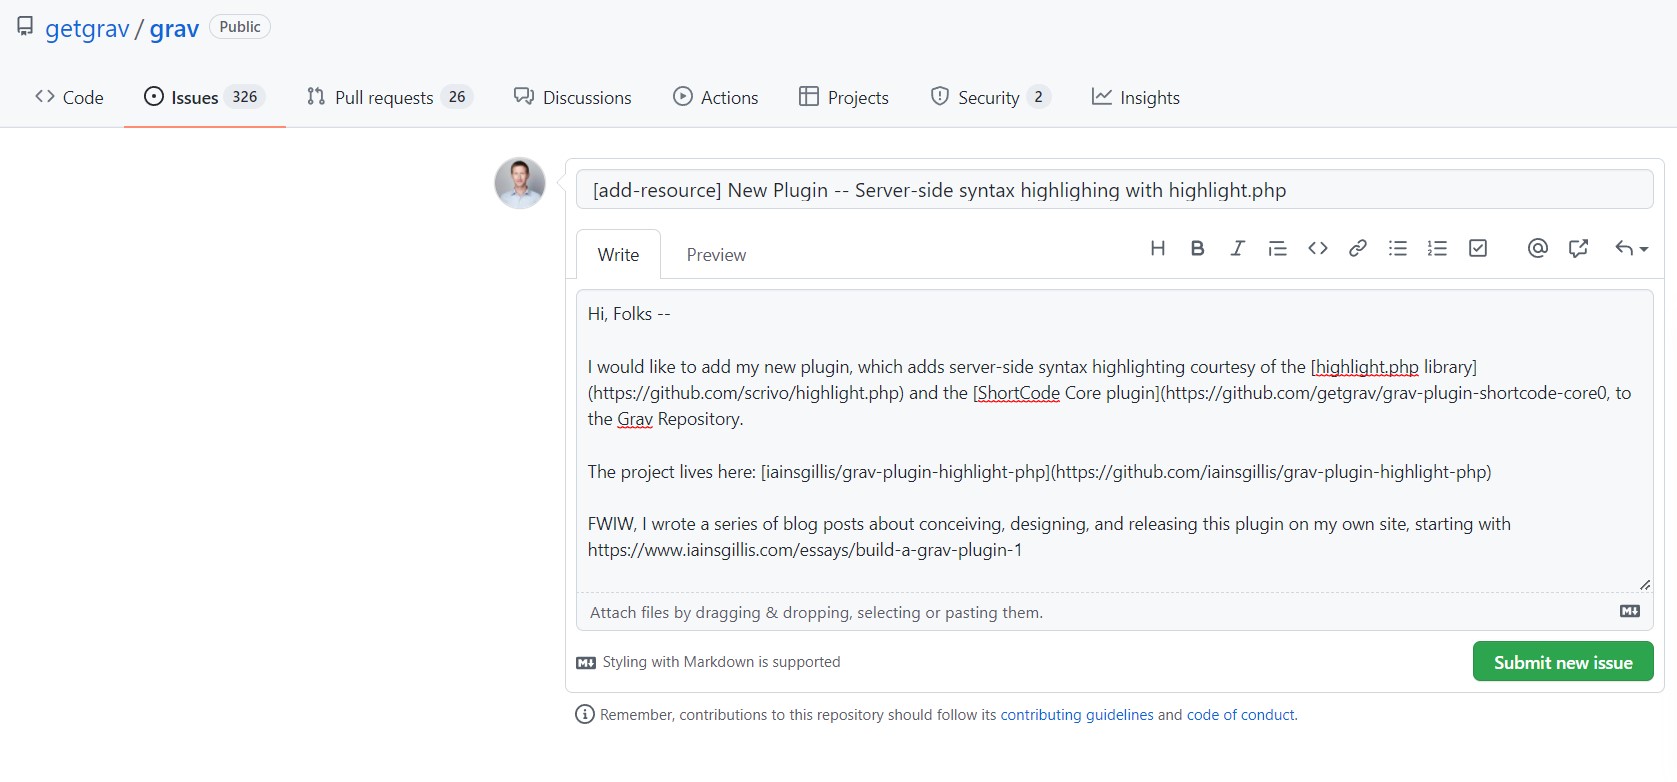
There’s a link to start this process in the documentation, with URL params that give a nice template to get you started. Follow the link, then update the text to be relevant to your plugin and click “Submit new issue” (screenshot below).

GitHub opens a new issue; you can follow the one I created here in the screenshot above here. Then it’s just a matter of waiting for the Grav team to do their testing and to add the plugin to the Grav Repository.
Conclusion
That’s basically a wrap for this series. (Although I need to tweak each of the posts to give some better navigation within the series.) Thanks for reading.
If you like what you see, and you’d like to hire me to do some dev work, or just to pick my brain, or to say hello (or give other feedback), send me an email at hello@iainsgillis.com.
Peace ✌️